Get Going with SNS


Every day that I commute home, I check Google Maps for the next Trimet bus arrival at the usual stop. There's nothing wrong with this ritual but it always distracts or leaves me stalled for a few empty minutes. Ever the proponent of laziness automation, I decided to build a stack that will do this for me by texting incoming arrival times for my bus home.
This is a great opportunity to get aquainted with AWS's Simple Notification Service (SNS) - A pub/sub service for push notifications, text (SMS), and email messaging, use the Stackery local development workflow, and finally tinker with the Trimet API - A read-only web service for Portland's stellar transit system.
Initial Stack
This stack will use the following AWS resources: a Function (using NodeJs), a PubSub Topic, and a Timer (to schedule Function invocations).
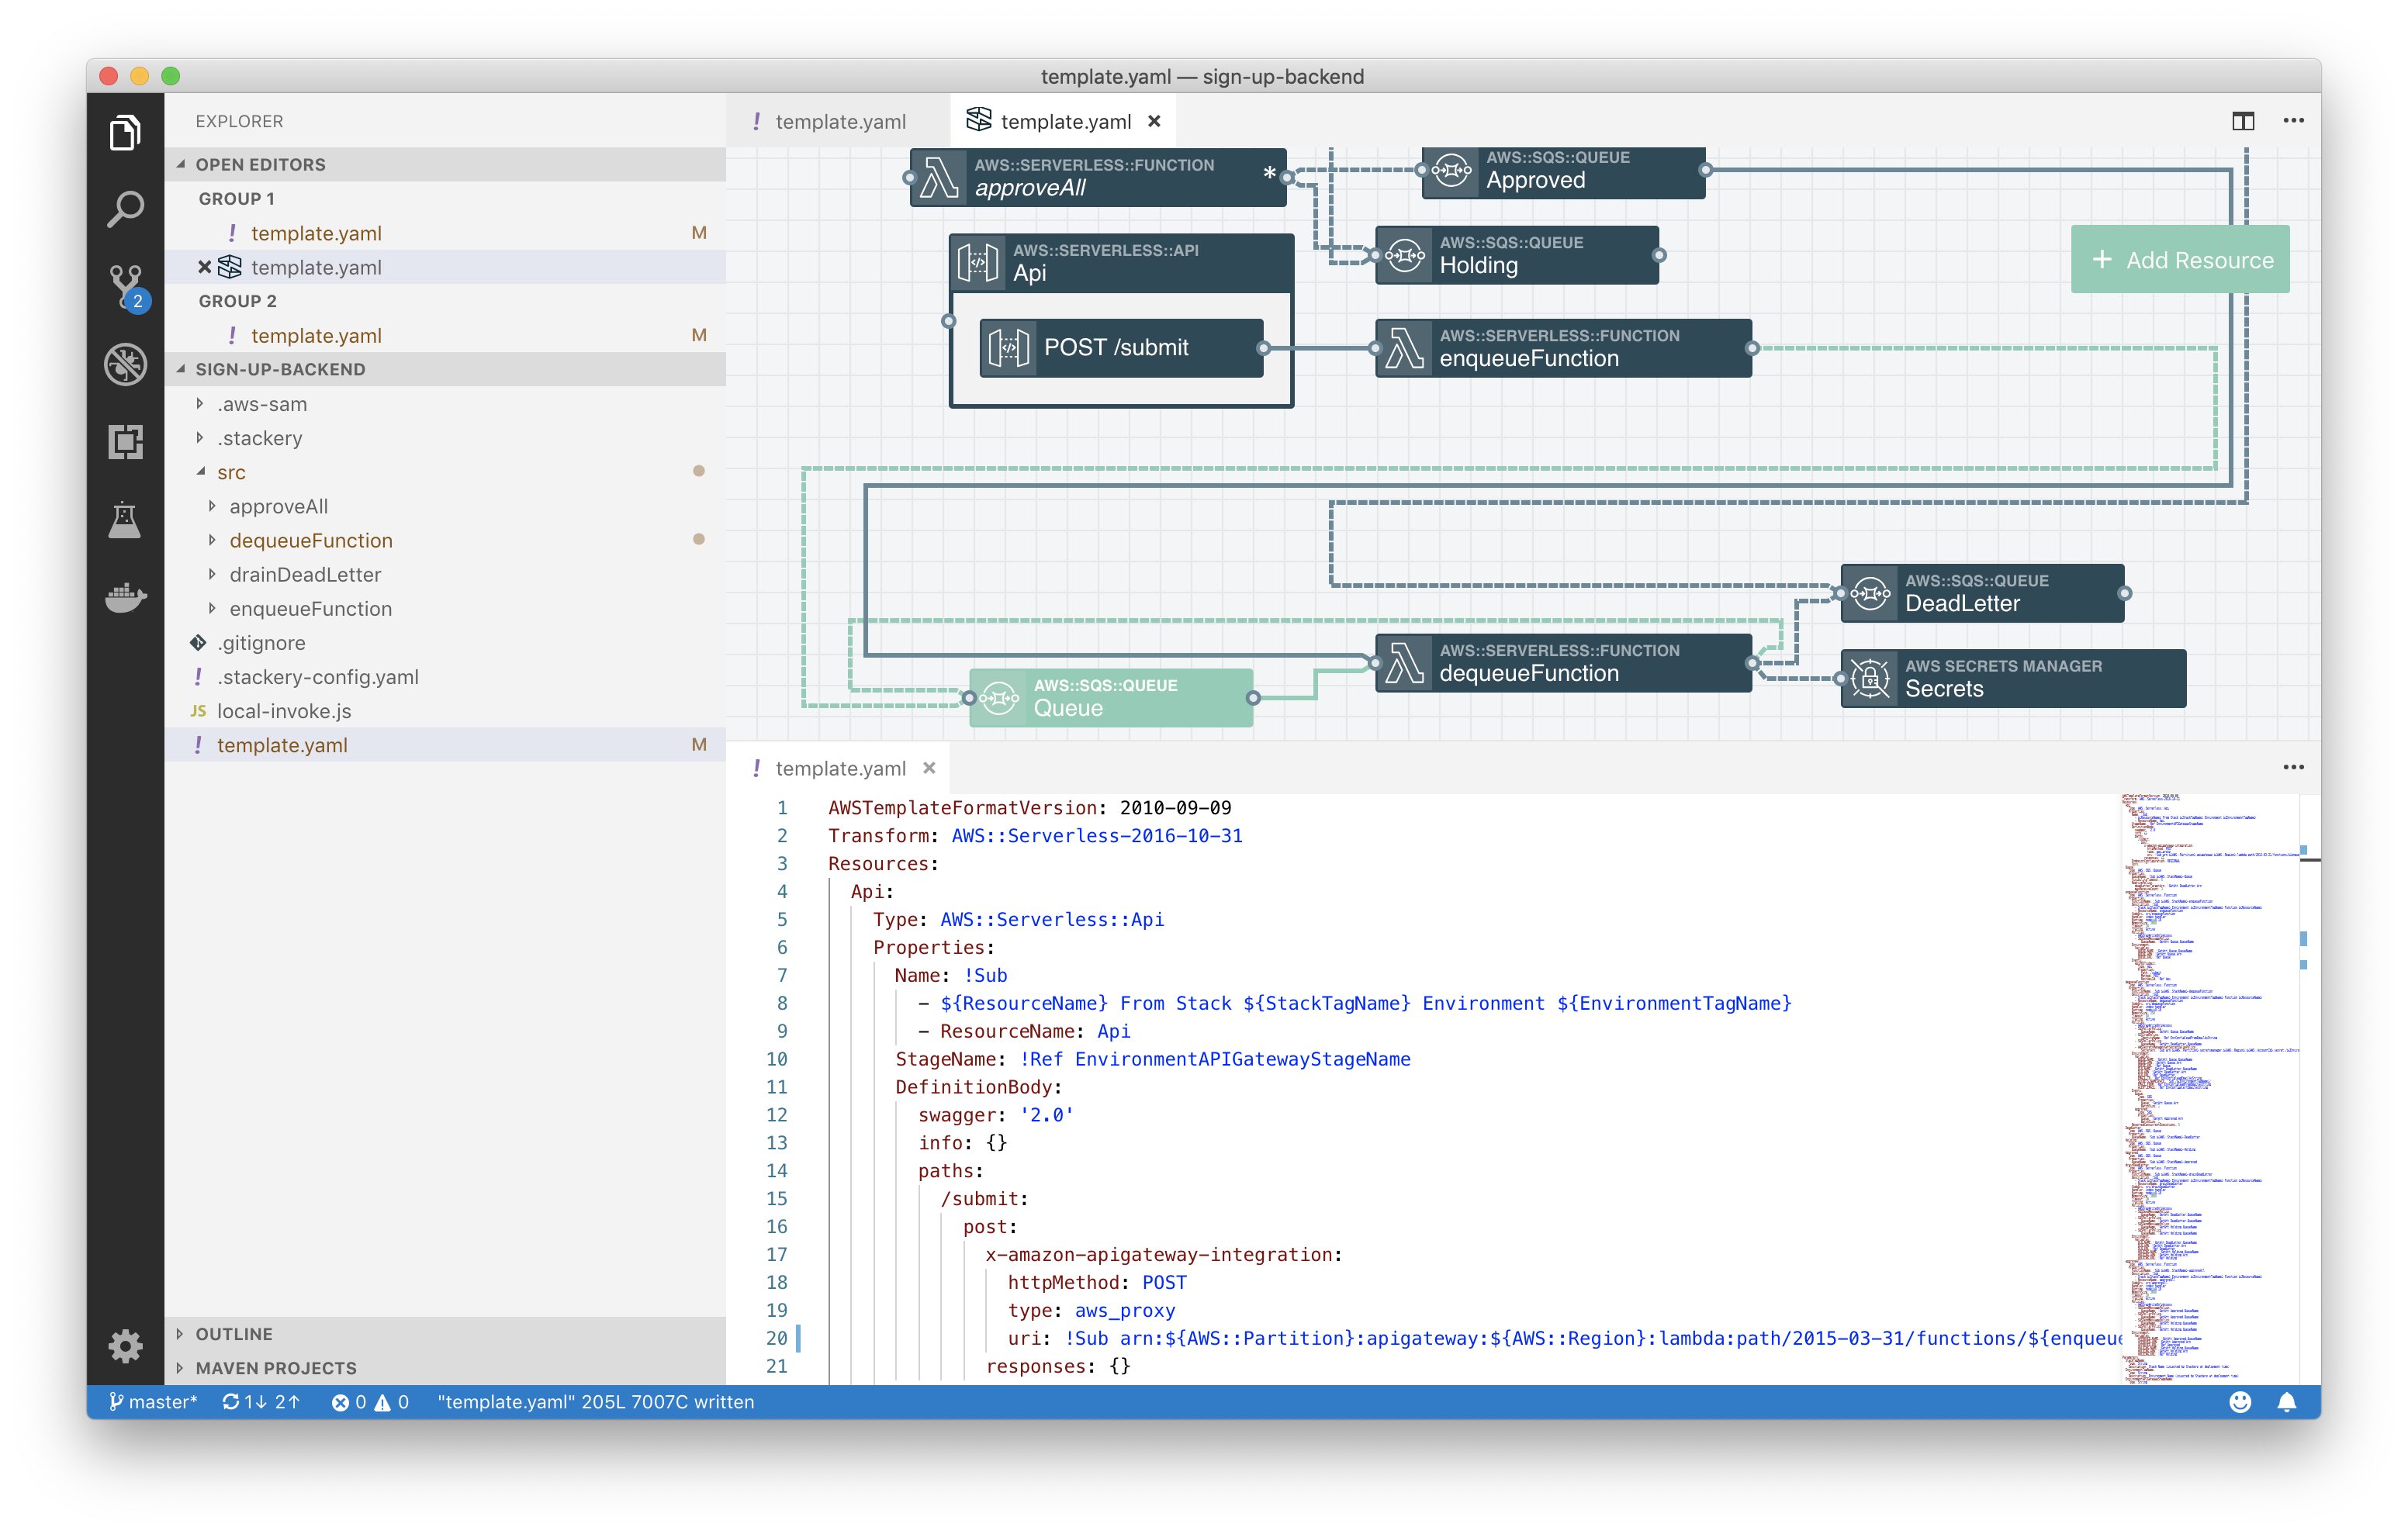
To begin, create a directory called trimet-texts, add a blank template.yaml file, and open that directory as a workspace in VSCode.
Then, use the Stackery VSCode extension to open a (blank) visualization in a VSCode tab. It's handy to split the window in VSCode so the template.yaml and Stackery plugin tab are side-by-side.
Add two (of the three) resources by clicking "Add Resource" (in the Stackery VSCode extension) and dragging (one-by-one) a Function and a Topic onto the canvas. Then double-click each resource and change their IDs, if you wish. In my stack, the Function is called "subscribeFetchPublish" and the Topic is called "Arrivals". The Timer resource will be added after the Function logic is behaving correctly.
Then, connect the Function to the Topic with a service discovery wire so the Topic's Amazon Resource Name (ARN) is available as an environment variable in the Function scope - which is required by AWS SDK methods to identify and manage topic subscriptions.

Setup a local workflow
After defining the inital stack, deploy it to an environment using Stackery's Local Checkout deployment strategy. The difference between this and other deployment strategies is that it uses the current working directory contents to package a build locally rather than using a Git reference to create a package in the Stackery backend. Deploying the stack (regardless of chosen strategy) is required for the next part of the workflow (local invoke) to succeed, so the Cloudside resources are available to the Function. Any further changes to the resource configuration will require additional deployments (e.g. after adding a Timer).
With the stack successfully deployed, invoke the function locally (with the --watch flag) in the VSCode terminal, from the project root directory. Passing the --watch flag enables the command to invoke the Function each time it's saved. When you see that initial console.log, it's time to go wild.
Down to business
With local invoke watching for saved changes, it's time to write the business logic that does the work. The Function will manage Topic subscriptions, fetch Trimet arrivals, and publish relevant arrivals as messages to the Topic. Arguably, these responsibilities could be split into separate functions, but since this is a protoype, I chose to keep all the behavior in one place.
Add package dependencies
The only required dependency is the aws-sdk to manage Topic subscription and publication. Additionally, I chose to use node-fetch as a lightweight request library to fetch Trimet arrivals and moment to format arrival times in the published message - both optional. Install package dependencies by running npm install <package-name> --save from the Function root directory, then require each one in the Function source code.
const AWS = require('aws-sdk');
const fetch = require('node-fetch');
const moment = require('moment');
Manage subscriptions
Let's pretend there are lots of users who want to subscribe to the Topic (even though there's currently only one/me). Each new subscription will be created with a unique endpoint (SMS-enabled number) and a FilterPolicy that defines which messages the subscriber receives. The TopicArn is available to the Function because of the service discovery wire added earlier.
const sns = new AWS.SNS();

const subscriptionsResults = await sns.listSubscriptionsByTopic({ TopicArn: process.env.TOPIC_ARN }).promise();
const subscriptions = subscriptionsResults.Subscriptions;

if (!subscriptions.find(subscription => subscription.Endpoint === endpoint)) {
  await sns.subscribe({
    Protocol: 'sms',
    TopicArn: process.env.TOPIC_ARN,
    Endpoint: '1503-555-5555',
    Attributes: {
      FilterPolicy: JSON.stringify({
        stopId: [12345],
        route: [1]
      })
    }
  }).promise();
}
To grant the Function permission to list and add subscriptions, it needs a policy added to its config in the template.yaml.
subscribeFetchPublish:
  Type: AWS::Serverless::Function
  Properties:
    ...
    Policies:
      ...
      - Statement:
          - Effect: Allow
            Action:
              - sns:Subscribe
              - sns:ListSubscriptionsByTopic
            Resource: '*'
Fetch Trimet arrivals
Next, add the request logic to fetch Trimet arrivals by stop (locationID). Then filter the results array by route.
const fetchArrivals = await fetch(`https://developer.trimet.org/ws/v2/arrivals?locIDs=12345&appID=ABCDEFGHIJKLMNOPQRSTUVWXY`, { method: 'GET' });
const fetchArrivalsResults = await fetchArrivals.json();
const arrivalsByRoute = fetchArrivalsResults.resultSet.arrival.filter(arrival => arrival.route === 1 && !arrival.dropOffOnly);
Publish messages
Use the filtered results and Promise.all to publish messages to the Topic. Assigning MessageAttributes to the message will determine which subscibers receive the message, based on the subscription FilterPolicy.
await Promise.all(arrivalsByRoute.map(arrival => (
  sns.publish({
    Message: `Bus ${arrival.route} comin up ${moment().to(new Date(arrival[arrival.status]))}!`,
    TopicArn: process.env.TOPIC_ARN,
    MessageAttributes: {
      'stopId': {
        DataType: 'Number',
        StringValue: '12345'
      },
      'route': {
        DataType: 'Number',
        StringValue: '1'
      }
    }
  }).promise()
)));
TLDR; The whole shebang
const AWS = require('aws-sdk');
const fetch = require('node-fetch');
const moment = require('moment');

exports.handler = async (event, context) => {
  const sns = new AWS.SNS();

  const subscriptionsResults = await sns.listSubscriptionsByTopic({ TopicArn: process.env.TOPIC_ARN }).promise();
  const subscriptions = subscriptionsResults.Subscriptions;

  if (!subscriptions.find(subscription => subscription.Endpoint === endpoint)) {
    await sns.subscribe({
      Protocol: 'sms',
      TopicArn: process.env.TOPIC_ARN,
      Endpoint: '1503-555-5555',
      Attributes: {
        FilterPolicy: JSON.stringify({
          stopId: [12345],
          route: [1]
        })
      }
    }).promise();
  }

  const fetchArrivals = await fetch(`https://developer.trimet.org/ws/v2/arrivals?locIDs=12345&appID=ABCDEFGHIJKLMNOPQRSTUVWXY`, { method: 'GET' });
  const fetchArrivalsResults = await fetchArrivals.json();
  const arrivalsByRoute = fetchArrivalsResults.resultSet.arrival.filter(arrival => arrival.route === 1 && !arrival.dropOffOnly);

  await Promise.all(arrivalsByRoute.map(arrival => (
    sns.publish({
      Message: `Bus ${arrival.route} comin up ${moment().to(new Date(arrival[arrival.status]))}!`,
      TopicArn: process.env.TOPIC_ARN,
      MessageAttributes: {
        'stopId': {
          DataType: 'Number',
          StringValue: '12345'
        },
        'route': {
          DataType: 'Number',
          StringValue: '1'
        }
      }
    }).promise()
  )));
};
Event Scheduling
For the final step, add a Timer to the stack then drag an Event Subscription Wire from its output port to the Function's input port. This connection will invoke the Function based on the Timer event settings. To define the event behavior, double-click the Timer in the canvas and update it with these settings: Id: Schedule, Type: Cron Expression and Cron Expression: 0/5 0-1 ? * MON-FRI *. This will invoke the Function every 5 minutes, between 5-6pm on weekdays. Cron Expressions have six required fields and use UTC time (e.g. PDT is UTC -7, so 5pm PDT is 12am/0 UTC). The stack needs to be deployed with this new resource:

Snags!
Like any software project throughout history, this hit some snags along the way.
Local workflow
The local development workflow requires AWS SAM CLI and Docker. These dependencies tripped me up a bit:
- Homebrew taps were out-of-date and
brew install aws-sam-clifailed withError: No available formula with the name "aws-sam-cli". Runningbrew tap aws/tapresolved it and I was then able to run the install command. - Installing Docker with Homebrew caused
dockerdcommand (starting the daemon) to fail, so I installed it from the Docker docs site instead and had success with the command after that.
SNS troubleshooting
I learned the hard way that publishing a message with Protocol: 'sms', while troubleshooting, can incur AWS service limit consequences. Since the local invoke watcher was running, the Function sent an SMS message each time I saved.
To determine if it was a problem with my code or the SNS resource, I sent a message from the AWS Console; that also failed. This StackOverflow thread led to the discovery that I was nearing the default Account Spending Limit for the month ($1.00), since I had essentially been spamming myself. It's sort-of involved to request a service limit increase, so I switched the publish message protocol to Protocol: 'email' and Endpoint: 'me@myemailaddress.com' and continued testing without jumping through AWS verification hoops.
Scaling up
There are many possibilities for scaling this up as a multi-user application. Going further, I would include additional resources: a Rest API for the ability to PUT subscriber records (endpoint, locationId, route, schedule) into a Dynamo DB table, a Function that manages topic subscriptions and creates a dynamic Timer set to the user's schedule, and a Function (invoked by the dynamic Timer) to manage Topic publishing. User data entry could be handled through a traditional frontend UI, or potentially, a frontend-free approach that could use two-way SMS and send subscriber requests to the API.
This prototype is just a proof-of-concept and laziness tool, but it's neat to imagine how this could scale by adding a few more resources (and biiit more code).
The visual editing provided by Stackery's new Visual Studio Code extension certainly makes it easier to visualize stack architecture and integrate with the Stackery CLI for deployments and cloudlocal function development. Check out the extension on the VSC marketplace!
Related posts